
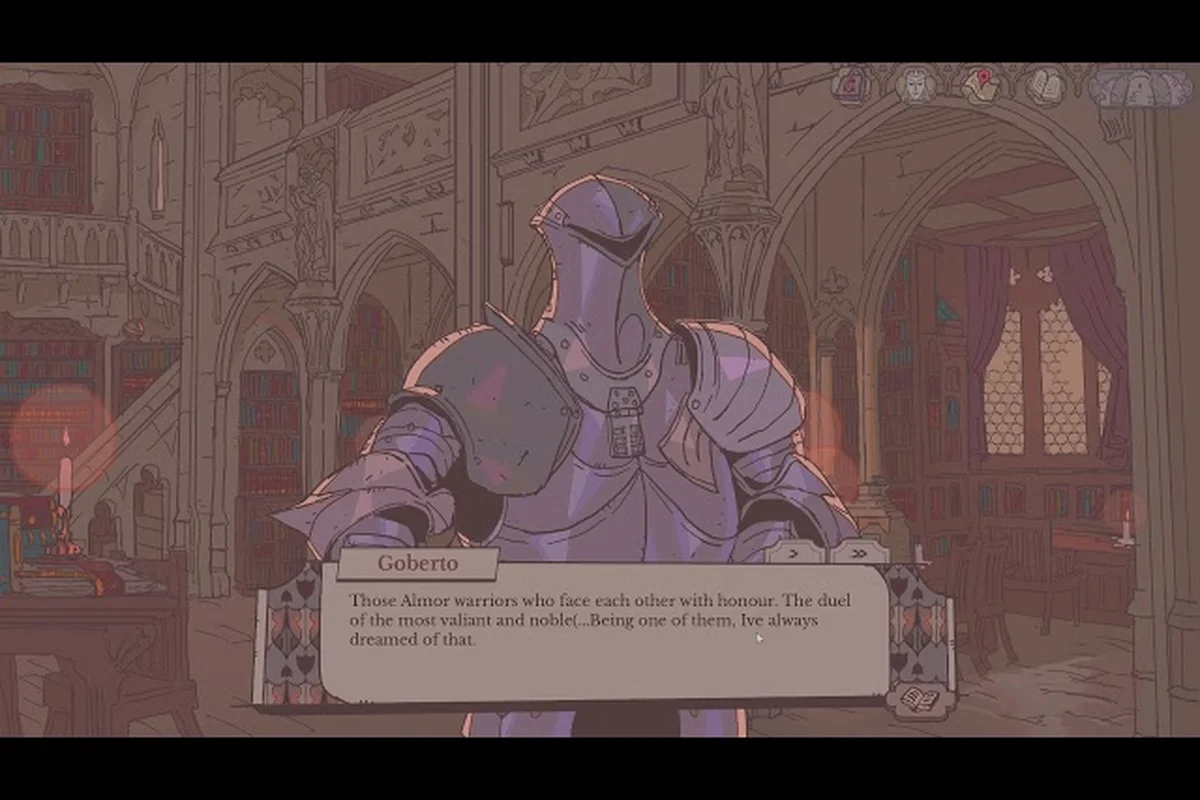
Every cycle inside the Tower is a fresh test of judgment, because the sovereign tower daily routine determines whether your kingdom thrives or crumbles before the week ends. Unlike sprawling strategy games where you can hoard resources indefinitely, this Arthurian management RPG forces you to make meaningful decisions each morning—and those choices compound faster than you expect. Discover the structure that turns chaos into order, one audience at a time.
Why Your Sovereign Tower Daily Routine Needs Structure
The Tower does not pause while you ponder. Each cycle delivers four recurring pressures, so a reactive playstyle leaves you permanently behind the curve: The sovereign tower tips from experienced players recommend choosing factions that align with your preferred playstyle—military-focused players court Nobility and Merchants, while diplomatic players invest in the People and Scholars.
-
Court audiences
-
Knight requests
-
Forge maintenance
-
The ever-present threat of disaster Players who treat every day as a fresh puzzle rather than a repeating chore consistently reach higher Nobility standings and unlock better endings, according to community reports on the Steam forums. The difference comes down to prioritization, not raw hours played.
Your sovereign tower daily routine should feel like a reflex by the third cycle, because hesitation costs resources that are genuinely scarce in the early game. When you understand which actions produce lasting value and which ones merely consume time, the whole Tower starts to feel manageable instead of overwhelming. The structure below compresses dozens of tested player strategies into one repeatable loop.
| Routine Phase | Time Cost | Primary Benefit | Risk If Skipped |
|---|---|---|---|
| Court Audiences | Medium | Faction reputation + rare requests | Stagnant standing with key factions |
| Knight Assignment | High | Quest progress + Knight XP | Idle Knights waste their strongest asset |
| Forge Repairs | Low | Armor integrity preserved | Permanent Knight death on next sortie |
| Resource Review | Low | Inventory awareness | Missed crafting opportunities |
| Demon Reset | Variable | Disaster recovery | Run-ending cascading failures |
The daily phases in order:
-
Court Audiences — medium time cost, faction reputation plus rare requests
-
Knight Assignment — high time cost, quest progress plus Knight XP
-
Forge Repairs — low time cost, armor integrity preserved
-
Resource Review — low time cost, inventory awareness
The key principle is that every phase feeds into the next one, so treating them as isolated mini-games misses the point entirely. A Knight who skips forge repairs because you were busy courting Merchants becomes a corpse on tomorrow's quest, and that loss ripples through your entire court morale. Structure exists to prevent exactly these preventable tragedies.
Opening With Court Audiences: Set the Day's Tone
Your first action each cycle should always be the court audience, because the requests presented there shape every decision that follows. According to the IGN preview, the audience loop directly affects your standing with Nobility, People, Merchants, and Scholars—four factions that rarely want the same thing at the same time. Approving a Merchant request might pad your coffers, but it can simultaneously irritate the People who see you as favoring trade over welfare.
The sovereign tower daily routine works best when you enter the audience chamber with a clear faction priority in mind. Are you courting the Merchants for a trade agreement? Then approve their high-value requests first and accept the temporary grumbling from other groups. Are you shoring up support among the People before a controversial decree? Then their requests take precedence, even when the gold offered by Nobility requests looks more tempting.
| Request Type | Faction Gained | Resource Cost | Best Used When |
|---|---|---|---|
| Trade Route Expansion | Merchants | Gold + Materials | Preparing for large construction |
| Festival Funding | People | Gold | Recovering from a disaster |
| Land Grant | Nobility | Territory Influence | Pushing for a military campaign |
| Research Patronage | Scholars | Gold + Time | Unlocking new technologies |
A common mistake reported by players is approving every request that offers gold, which spreads your reputation so thin that no faction actually trusts you. The court audience phase works best when you deliberately ignore certain requests, because declining a petition still communicates that you understand the kingdom's priorities. The faction you court consistently will reward you with exclusive quests and discounts that far exceed the small gains from scattered approvals.
Assigning Knights to Profitable Quests
Once the audience concludes, your Knights need direction, and this is where the sovereign tower walkthrough often diverges between casual and optimized play. Each Knight has a distinct archetype—the IGN preview highlights a goth knight, a wolf knight, and a childlike giant—and these archetypes map to specific quest types where they excel. Assigning a Knight to a quest that matches their strengths can cut completion time in half, while mismatched assignments waste both time and durability.
The sustainable sovereign tower daily routine involves assigning Knights to two or three quests that complement their skills, not spreading them thin across every available contract. If your goth knight excels at investigation missions, for example, then that Knight should handle the mystery quests whenever they appear, while the wolf knight takes combat-heavy assignments and the childlike giant handles tasks requiring raw endurance. This specialization produces faster completions and fewer injuries.
Reading Quest Descriptions Carefully
Quest text often hides crucial information about required attributes, and players who skim through these descriptions frequently send the wrong Knight into a dangerous situation. Look for keywords like "stealth," "combat," "diplomacy," or "lore" in each quest description, because these signal which archetype will perform best. A quest that demands stealth will punish a heavily armored Knight with durability loss, while a diplomacy quest might give a combat-focused Knight no bonus at all.
Balancing Risk and Reward
Not every quest needs to be completed immediately, because some contracts offer rewards that do not justify the risk to your current Knight roster. The sovereign tower tips from veteran players consistently emphasize that a failed quest costs more than just the missed reward—it also damages Knight armor and potentially triggers injuries that require recovery time. When your best Knight is already wounded, sometimes the optimal move is to decline a high-risk quest and send them to a safer contract instead.
| Knight Archetype | Best Quest Types | Worst Quest Types | Priority Value |
|---|---|---|---|
| Goth Knight | Investigation, Lore | Combat Siege | High for mystery chains |
| Wolf Knight | Combat, Hunting | Diplomacy | High for war campaigns |
| Childlike Giant | Endurance, Construction | Stealth | Mid for infrastructure |
| Generic Knight | Any | No specialty | Low—replace when possible |
Forge Repairs: The Non-Negotiable Step
Before you close out the cycle, visit the forge, because the blacksmith can only fix one knight's armor per cycle—a hard limit that forces you to plan repairs in advance. This constraint, highlighted in the official Steam page for the game, means you cannot simply repair everyone every day and must instead track which Knight faces combat next. Sending a Knight into battle with damaged armor risks permanent death, and the armor-death mechanic reported by IGN means that losing a beloved Knight is not just a setback but a permanent narrative loss.
The sovereign tower daily routine prioritizes forge repairs for the Knight who will fight in the next cycle, even if a different Knight has lower armor integrity. This forward-looking approach prevents the worst-case scenario: a Knight dying because you repaired the wrong person yesterday. If no combat quests are scheduled for tomorrow, then repair the Knight with the lowest armor percentage to keep everyone healthy.
A secondary consideration for the forge is materials management, because repairs consume resources that also fuel construction and crafting. Players who spend all their materials on repairs early in the game often hit a wall when they need to upgrade the Tower itself. The sovereign tower tips suggest keeping a small material reserve for emergencies, which gives you flexibility when a Knight returns from a quest with unexpectedly heavy damage.
The Demon's Omniscience: Your Reset Button
Disasters will happen, and when they do, the Demon's Omniscience offers a time-rewind mechanic that PC Gamer called one of the best time travel systems they have ever encountered. According to their hands-on coverage, this system allows you to reset the cycle and try a different approach when events spiral out of control. The sovereign tower daily routine treats the Demon not as a cheat code but as a strategic resource, because using it wisely can salvage a run that would otherwise collapse.
The key insight is that using the Demon early prevents worse outcomes later, because small mistakes compound into catastrophic failures over multiple cycles. If a Knight died due to a misjudged quest, reset immediately rather than trying to continue with a depleted roster. However, players also report that overusing the Demon creates a crutch that prevents learning from mistakes, so the best approach is to reserve it for genuinely run-ending errors.
| Disaster Type | Common Cause | Demon Reset Value | Prevention |
|---|---|---|---|
| Knight Death | Mismatched quest assignment | High—restore roster | Read quest descriptions carefully |
| Faction Collapse | Ignoring a faction too long | High—rebuild trust | Balance audience approvals |
| Resource Exhaustion | Overbuilding without income | Medium—retry economy | Monitor gold and materials |
| Morale Cascade | Multiple failures in a row | Medium—break the spiral | Assign safe quests after losses |
The Demon's Omniscience also serves as a learning tool, because each reset lets you observe how different choices produce different outcomes. Players who treat resets as experiments rather than failures tend to master the sovereign tower daily routine faster, since they build a mental model of cause and effect across the Tower's systems. For a deeper breakdown of the game's interconnected mechanics, check our systems explained guide.
Optimizing Faction Standing Through the Daily Cycle
Your daily choices gradually shift the political landscape, and maintaining balanced faction standing requires more than just approving requests. The sovereign tower daily routine naturally generates faction interactions through quests, audiences, and even the Knights you send on missions. Each faction has its own priorities, and players who ignore one group for too long face consequences ranging from higher prices to outright rebellion.
Each faction responds to different court actions: The faction you court consistently will reward you with exclusive quests and discounts that far exceed the small gains from scattered approvals. A diplomatic run spends more time in court audiences and accepts lower combat efficiency in exchange for faction bonuses that unlock peaceful resolutions.
-
Nobility — cares about prestige and military strength; sending Knights on combat missions and granting land requests earns their favor
-
People — responds to festivals and humanitarian actions, which often cost gold but generate goodwill that stabilizes your rule
-
Merchants — want trade routes and economic policies, while Scholars seek research funding and access to ancient knowledge. Balancing these four groups within a single daily cycle is the core challenge of the sovereign tower walkthrough.
Tracking Faction Relationships
The game tracks your standing with each faction numerically, and paying attention to these values helps you decide which requests to approve. A faction sitting at zero or below requires immediate attention, because negative standing triggers penalties that affect your entire kingdom. Community testing suggests that maintaining all four factions above zero is the minimum threshold for a stable run, while pushing two factions above fifty unlocks exclusive story content.
Long-Term Reputation Strategy
While the daily routine handles immediate needs, your long-term strategy should involve picking one or two factions to court heavily while keeping the others from collapsing. The sovereign tower tips from experienced players recommend choosing factions that align with your preferred playstyle—military-focused players court Nobility and Merchants, while diplomatic players invest in the People and Scholars. This specialization produces stronger bonuses than trying to please everyone equally, because faction-specific rewards scale with your standing.
Crafting a Flexible Routine for Different Playstyles
The sovereign tower daily routine described above works well for most situations, but different playstyles require adjustments to the core loop. A military-focused run prioritizes combat quests and forge repairs above all else, since keeping Knights alive and battle-ready matters more than court politics. A diplomatic run spends more time in court audiences and accepts lower combat efficiency in exchange for faction bonuses that unlock peaceful resolutions.
Resource management also affects how you structure your routine, because a kingdom with abundant gold can afford to skip some requests while a poor kingdom must chase every coin. The sovereign tower walkthrough for beginners typically recommends a balanced approach until you understand how each system interacts, after which you can specialize with confidence. For a broader overview of getting started, our beginner guide covers the fundamentals in more detail.
Adjusting for Knight Availability
When a Knight is injured or recovering, your routine must adapt to the reduced roster. This might mean declining combat quests entirely and focusing on diplomatic or economic actions instead, since sending an under-equipped Knight into battle risks permanent death. The armor-death mechanic makes this caution essential, because losing a leveled Knight to a careless decision is one of the most frustrating setbacks in the game.
Responding to Random Events
Random events will occasionally interrupt your routine, and how you respond determines whether they become opportunities or disasters. A merchant caravan arriving with rare materials might tempt you to spend gold, but that same gold might be needed for forge repairs tomorrow. The sovereign tower tips advise keeping a mental buffer of at least 200 gold at all times, which covers most emergency expenses without derailing your long-term plans.
Common Mistakes That Break the Daily Cycle
Even experienced players stumble into traps that disrupt their sovereign tower daily routine, and recognizing these patterns early saves you from frustrating restarts. The most common mistake is overassigning Knights to too many quests, which spreads them thin and increases the chance of failure. The routine works best when Knights focus on two or three objectives per cycle, not five or six.
Another frequent error is ignoring the forge until armor breaks, which treats repairs as reactive rather than proactive. Since the blacksmith can only repair one Knight per cycle, you need to plan repairs at least one cycle in advance. Players who skip this planning often find themselves unable to send their best Knight on a critical quest because the armor is too damaged to survive.
| Mistake | Why It Hurts | Better Approach |
|---|---|---|
| Approving every request | Faction reputation spreads too thin | Focus on 1-2 factions per run |
| Ignoring quest descriptions | Knight mismatch causes failures | Always read quest details |
| Skipping forge repairs | Armor death risk escalates | Repair before sending Knights out |
| Overusing Demon reset | Prevents learning from mistakes | Reserve for run-ending errors |
| Hoarding resources | Missed progression opportunities | Maintain a buffer, spend the rest |
The sovereign tower daily routine also breaks down when players panic after a disaster and abandon their structure entirely. A single bad cycle does not end your run, provided you respond calmly and use the Demon's Omniscience judiciously. Players who maintain their routine even after setbacks consistently outperform those who restart on every failure.
Frequently Asked Questions
How long does a full Sovereign Tower daily routine take to complete?
A single cycle takes roughly 15 to 20 minutes of focused play, depending on how many requests and quests you process. The court audience phase typically consumes 5 minutes, Knight assignment takes another 5 to 10, and forge repairs plus resource review wrap up the cycle. This makes the routine manageable even during short play sessions.
Can the blacksmith repair multiple Knights in one cycle?
No, the blacksmith can only fix one Knight's armor per cycle, which is a hard limit confirmed on the official Steam page. This forces you to prioritize which Knight needs repairs most urgently, usually the one scheduled for combat in the next cycle. Planning ahead prevents the situation where multiple Knights require repairs simultaneously.
Should I use the Demon's Omniscience on every failure?
No, because overusing the reset mechanic prevents you from learning how to handle adversity. Reserve the Demon for run-ending disasters like Knight deaths or faction collapses, and try to play through minor setbacks naturally. Players who rely too heavily on resets often struggle when they eventually face a situation the Demon cannot fix.
Which faction should I prioritize in my daily routine?
The best faction depends on your playstyle, but most players recommend choosing between Nobility for military campaigns or Merchants for economic growth. The People and Scholars offer valuable bonuses too, but they tend to shine in later stages of the game. Pick one primary faction to court while keeping the others above zero.
Does the daily routine change in later game cycles?
Yes, the routine evolves as you unlock new options and face harder challenges. Later cycles introduce more complex quests, stronger enemies, and additional resource demands that require adjustments to your priorities. The core structure of audiences, quests, and forge repairs remains constant, but the specifics shift with your kingdom's development.